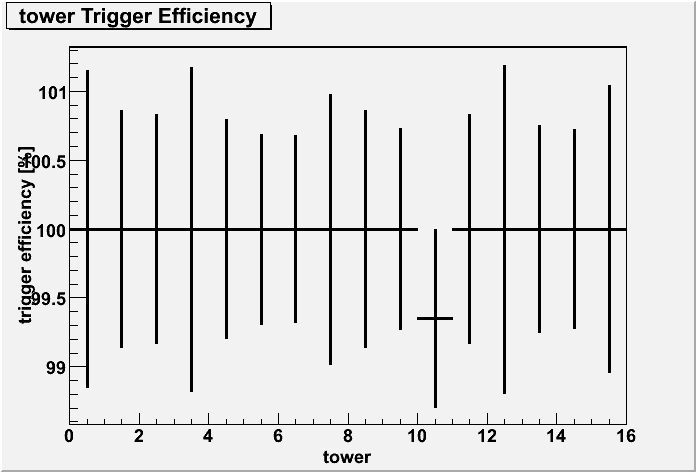
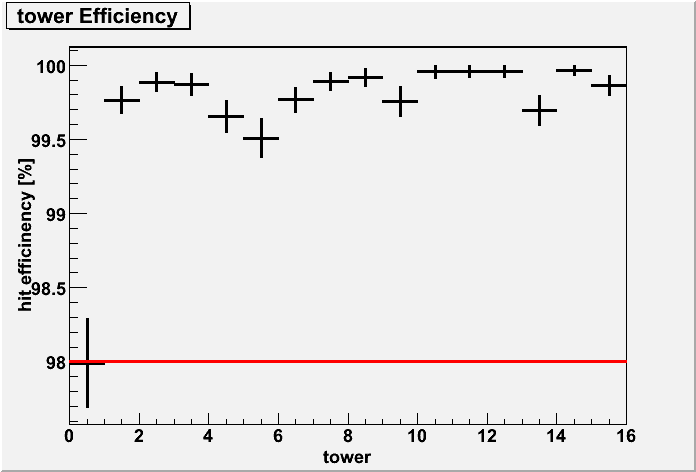
tower efficiency, 98.0% < 98.0%: Tower 0
Lat averaged hit efficiency: 99.7%
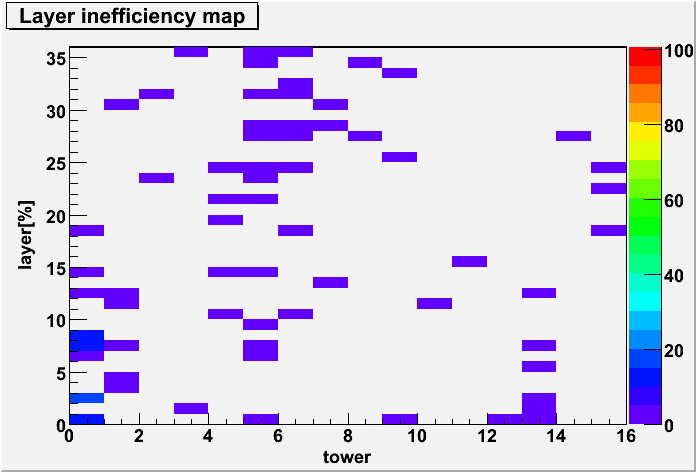
layer efficiency, 89.9% < 90.0%: Tower 0 Layer Y0
layer efficiency, 84.5% < 90.0%: Tower 0 Layer X1
layer efficiency, 86.1% < 90.0%: Tower 0 Layer Y3
layer efficiency, 85.7% < 90.0%: Tower 0 Layer Y4

layer Occucpancy, 1.4e-01 > 8.0e-02: Tower 0 Layer X7
layer Occucpancy, 2.0e-01 > 8.0e-02: Tower 3 Layer Y17
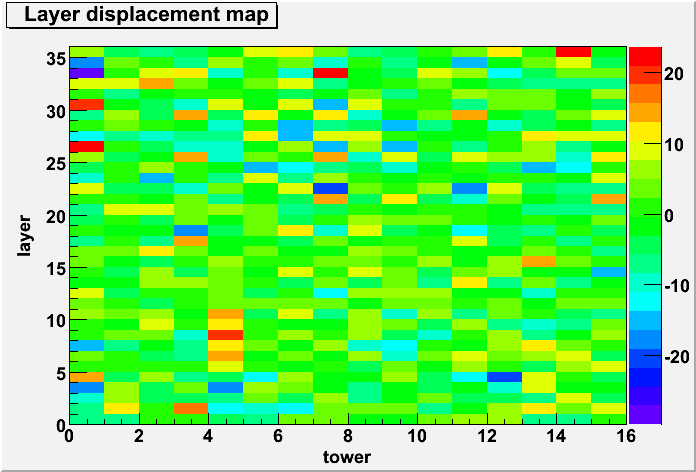
layer displacement, | -29.7/5.7 | > 5.0: Tower 0 Layer X16
layer displacement, | -19.4/3.2 | > 5.0: Tower 12 Layer Y2

strip:867 occupancy, 2.6e-02 > 2.0e-02: Tower 0 Layer X7
strip:869 occupancy, 3.1e-02 > 2.0e-02: Tower 0 Layer X7
strip:871 occupancy, 2.6e-02 > 2.0e-02: Tower 0 Layer X7
strip:1224 occupancy, 3.2e-02 > 2.0e-02: Tower 2 Layer Y15
strip:1232 occupancy, 2.1e-02 > 2.0e-02: Tower 2 Layer Y15
strip:91 occupancy, 3.4e-02 > 2.0e-02: Tower 3 Layer Y17
strip:95 occupancy, 1.8e-01 > 2.0e-02: Tower 3 Layer Y17
strip:1214 occupancy, 2.1e-02 > 2.0e-02: Tower 3 Layer Y17
strip:35 occupancy, 7.3e-02 > 2.0e-02: Tower 4 Layer X6
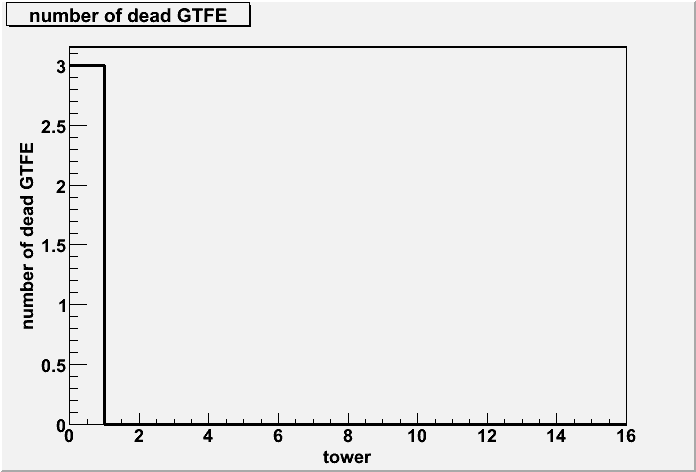
Dead GTFE(No.20): Tower 0 Layer X1
Dead GTFE(No.21): Tower 0 Layer X1
Dead GTFE(No.3): Tower 0 Layer Y3